Pandora
Mana PF also uses Nukemaru’s video for this phase.
After the cutscene, Pandora quickly opens with her first mechanic.
Fulgent Blade(光塵の剣)
The boss will cast Fulgent Blade, which starts with raid-wide damage. The boss will also autoattack during this sequence (before casting to cast Akh Morn).
Pandora’s autoattacks hit the top two players with hate (which should be both tanks).
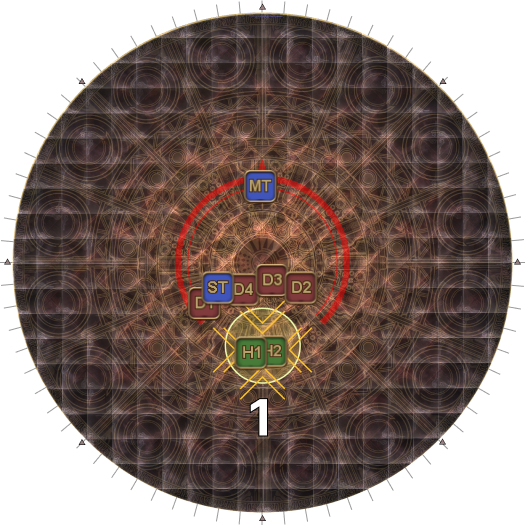
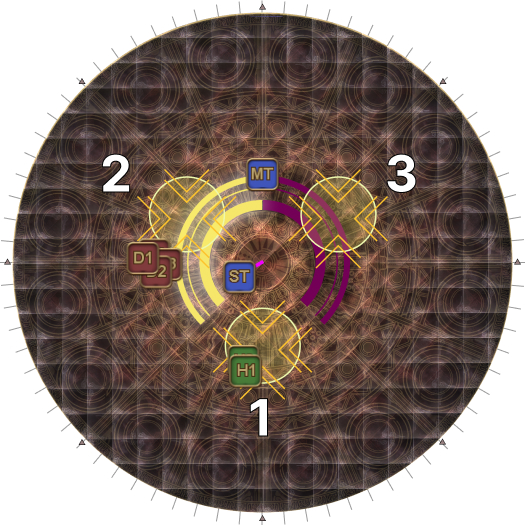
| 1. Six lines will be drawn on the ground somewhere in this formation. | 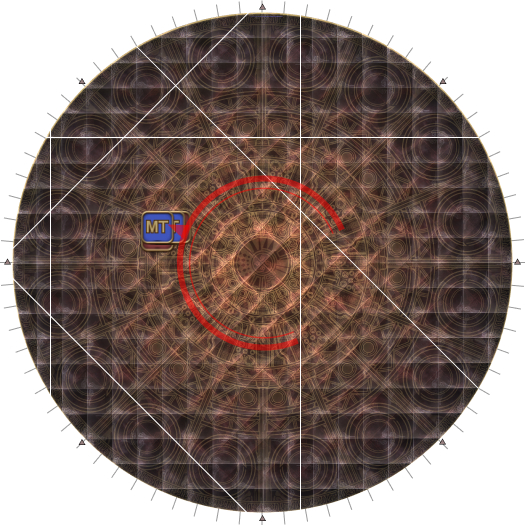 |
| 2. Identify the four right-angled triangles making up a "crown" (marked in green), and orient your camera to face them. | 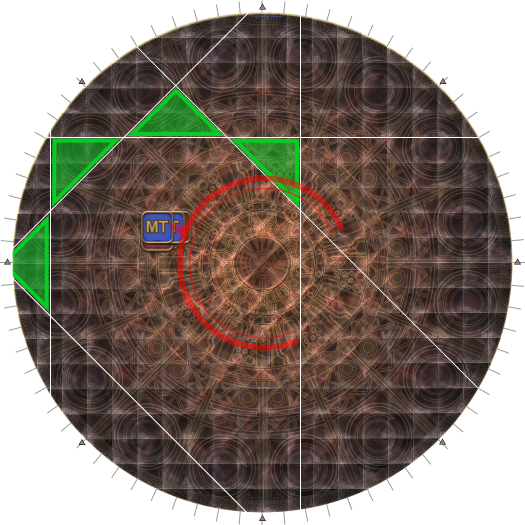 |
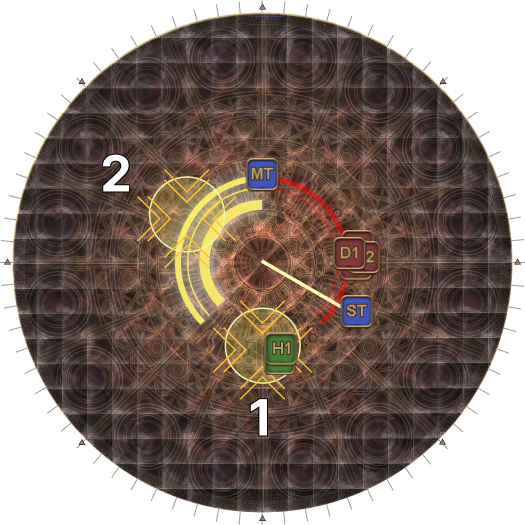
| 3. Either the two left-most or the two right-most lines will glow with a telegraph. Which pair of lines glow first indicates the order of the next pair of lines as they make their way around the crown. (In this example, the two right-most lines glow first, so the party will dodge to the right later in Steps 5 and 7.) | 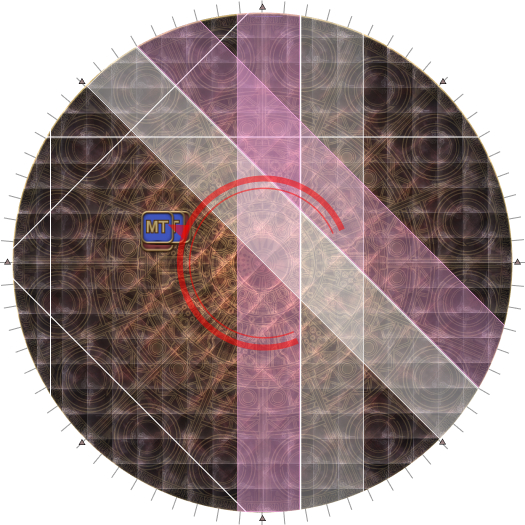 |
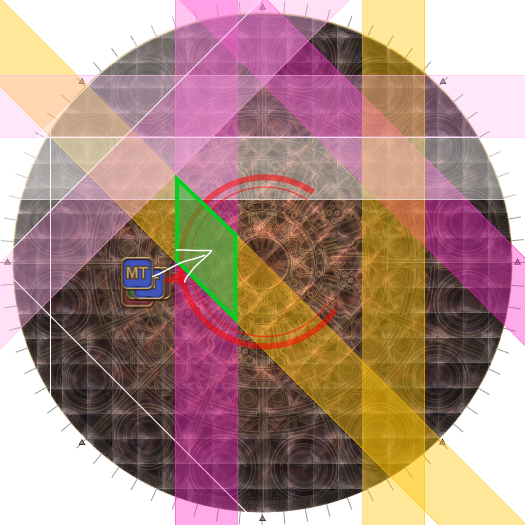
| 4. The first set of line AoEs resolve. The AoEs will intersect in a diamond (marked in green), which you'll want to watch. Stand a bit away from the diamond, and prepare to move in. | 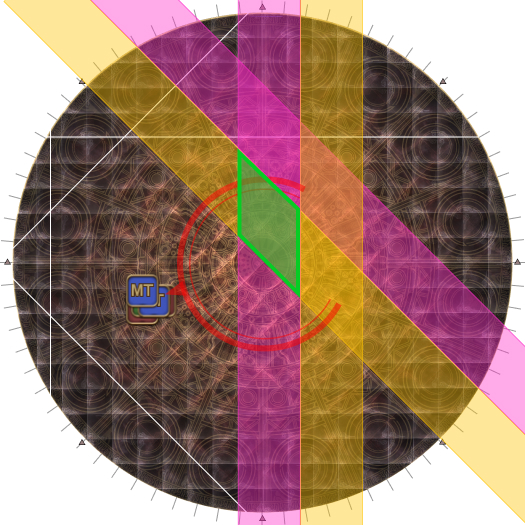 |
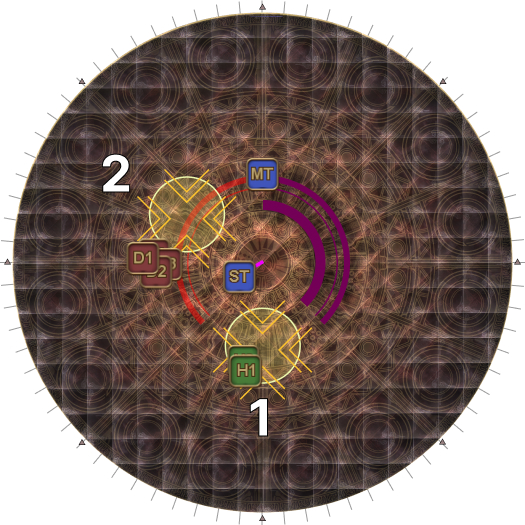
| 5. Dodge into the diamond (marked in green), and then prepare to dodge left or right (depending on which side glowed first), for the next step. You can also dodge diagonally into the left or right corner of the diamond instead (again, depending on which side glowed first.)
|  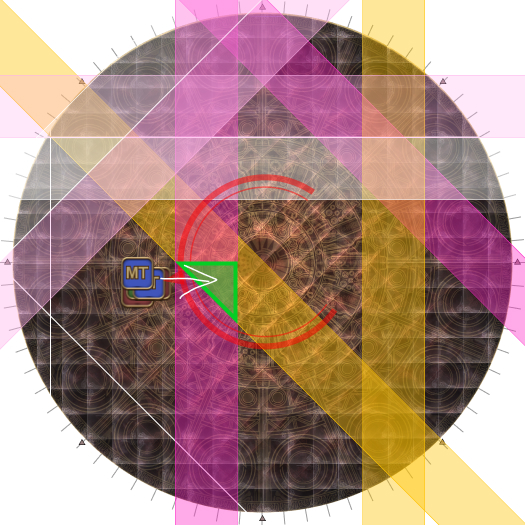 |
| 6. Move left or right (whichever side glowed first) when the next set of line AoEs go off. If you dodged diagonally in the previous step, stay where you are. (In this example, the right-side glowed first, so the party dodges to the right.)
| 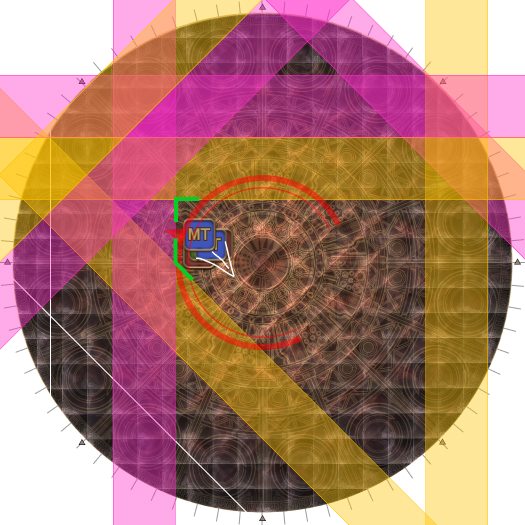 |
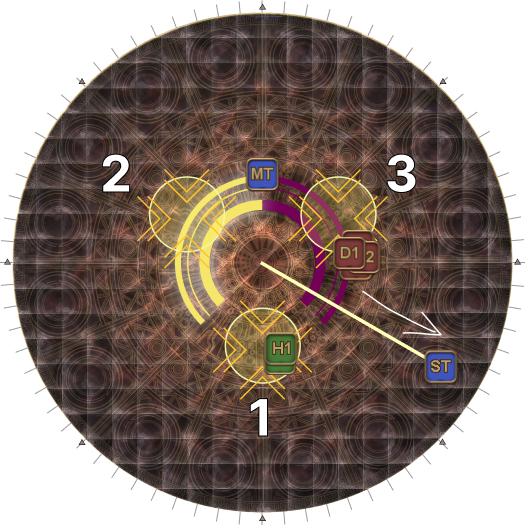
| 7. We alternate between dodging into the diamond, and dodging to the left or right again. Here, we dodge into the diamond (marked in green), and then prepare to dodge left or right (depending on which side glowed first). Alternatively, you can dodge diagonally into the left/right side.
The boss will stop following the main tank and begin to cast Akh Morn during this dodge. |  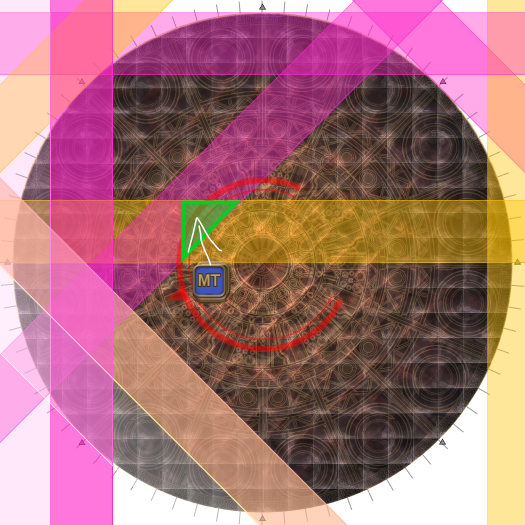 |
| 8. And dodge left or right once more (or stay put if you dodged in diagonally).
|  |
| 9. This will be the third (and final) dodge into the diamond. This time, there's no need to keep track of which side to dodge towards (and the MT is free to dodge anywhere within the diamond). | 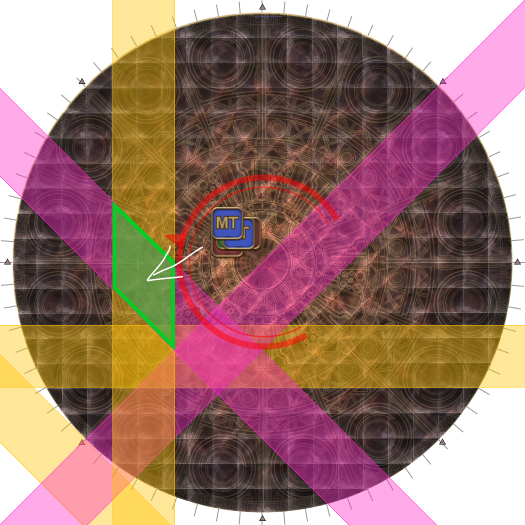 |
| 10. Wait for one more set of line AoEs to resolve. |  |
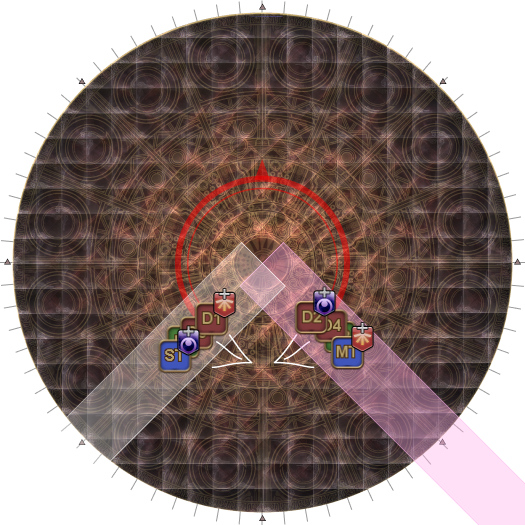
| 11. Stack in two 4-man light parties. The two parties must be on Pandora's left/right sides.
|  |
| 12. Akh Morn resolves together with the next set of line AoEs, targeting a random person on each side of the boss (left vs. right) with a stack AoE. | 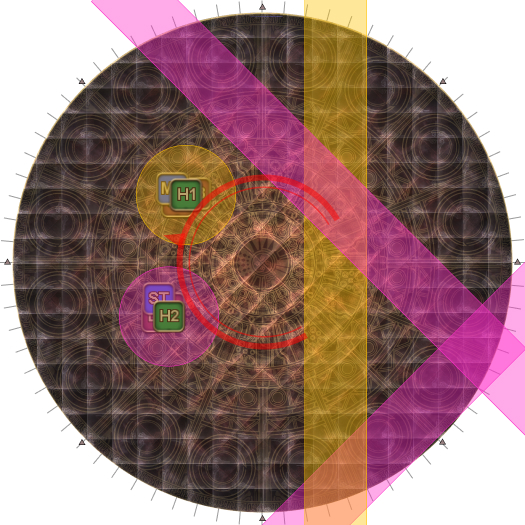 |
After the Akh Morn, Pandora goes straight into the next mechanic.
Paradise Regained(パラダイスリゲインド)
This is the most complex mechanic of the phase.
| 13. Find the first tower. Use this tower as South.
|  |
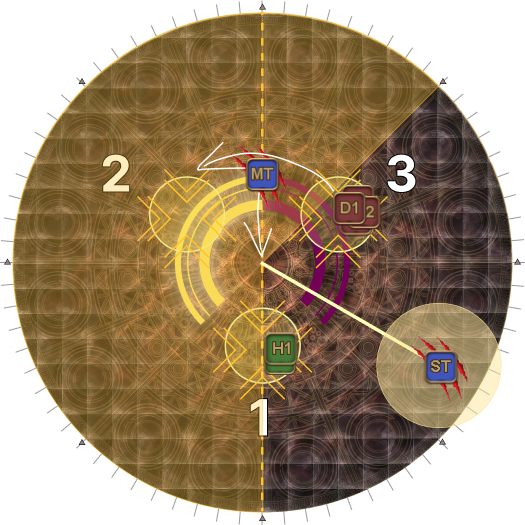
| 14. The second tower appears. At the same time, the boss will cast Wings Dark and Light, and one of the boss's wings will glow.
Everyone else should move to the side of the boss, depending on which wing glows first. The DPS should position themselves left or right and prepare to take the upcoming towers.
A tether will also appear, which needs to go to the ST. It cannot be passed around, but instead automatically tethers to either the nearest or furthest player that is not the player with aggro (depending on the wing).
| |
| Light (Left) wing first | Dark (Right) wing first |
 |  |
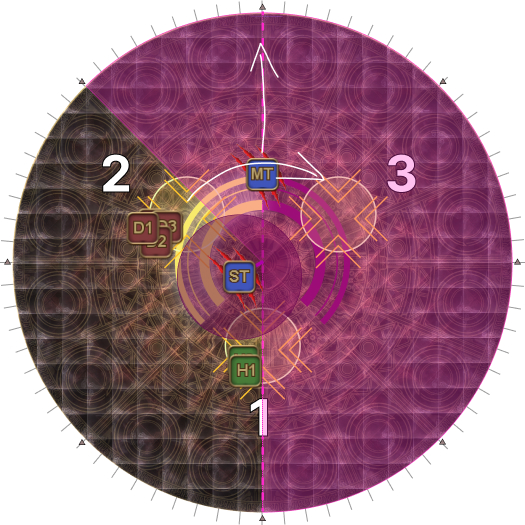
| 15. The third tower appears and the other wing glows. | |
 |  |
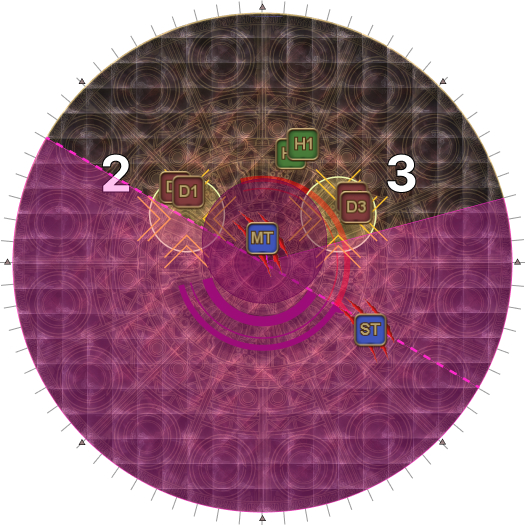
| 16. The boss will cleave the MT with a 180 + 45 degree cleave and hit the tethered player (which should be the ST) with an AoE tankbuster. This should be mitigated with all tank mitigations and/or invulnerabilities. This first cleave resolves together with the first tower (which should be taken by H1 and H2).
| |
 |  |
| 17. The boss now cleaves the ST, and hits the tethered player (which should now be the MT) with an AoE tankbuster. This second cleave resolves together with the second tower (which should be taken by two DPS). | |
 |  |
| 18. The two remaining DPS stay put for the third tower. | 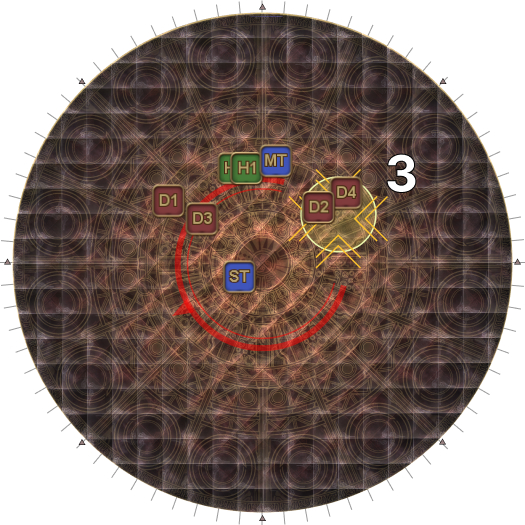 |
Have the MT Provoke to take the boss back, and face the boss to any of the eight cardinal/intercardinal markers to prepare for the final mechanic of the loop.
Polarizing Strikes(星霊の剣)
This is the simplest mechanic of the phase, consisting of four rounds of stack damage.
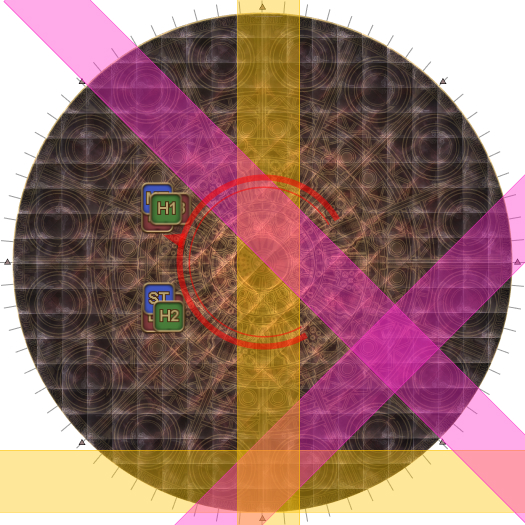
| 19. Make two lines SW and SE with the tanks in front. The boss will fire a Light-aspected line AoE at the line on the left, and a Dark-aspected line AoE at the line on the right. Both line AoEs will leave behind a residual AoE that explodes again shortly. The player in front of each line (which should be the tanks) will also get a Light Resistance Down or a Dark Resistance Down debuff (depending on which line hit them). | 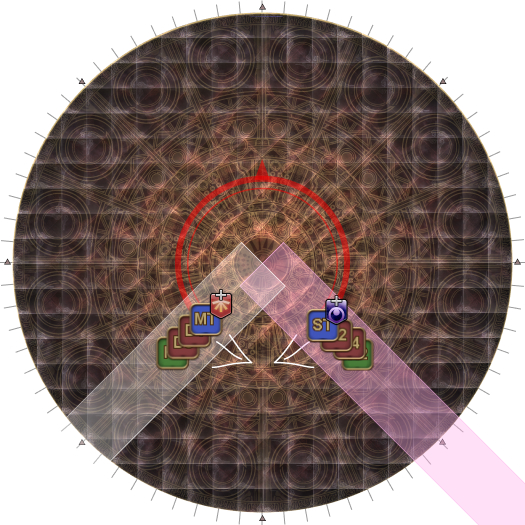 |
| 20. After the line AoEs go off, return to the two lines SW and SE. However, because the first player in each line got a Light Resistance Down and Dark Resistance Down debuff, they cannot rejoin their previous line. As a result, the two people that were in front of the line before needs to switch sides. | 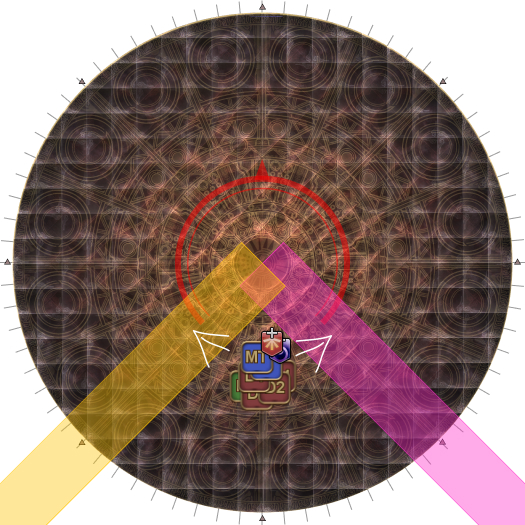 |
| 21. The process then repeats for a total of four times, with a different player at the front of the line instead.
|  |
After this, Pandora casts Pandora’s Box, which is a Tank LB3 check.
From there, the mechanics repeat one more time from Fulgent Blade, and ends with a third round of Fulgent Blade into Akh Morn.
After that, Pandora casts Paradise Lost as the hard enrage.
Sometime during Paradise Lost (when the castbar reaches the “r” in “Paradise”), Ryne will exclaim “You can weather this! I know you can!” and give you 1.5 bars worth of Limit Break, which should reach an LB3. When she does so, immediately LB3 (or it will not resolve before the enrage).
Who LBs is usually discussed at the start, or during the cutscene before this phase (and may change if there’s a DNC in the party), but a priority may look something like:
| Limit Break priority | MNK > DRG > NIN > SAM > VPR > RPR |
Frequently Asked Questions
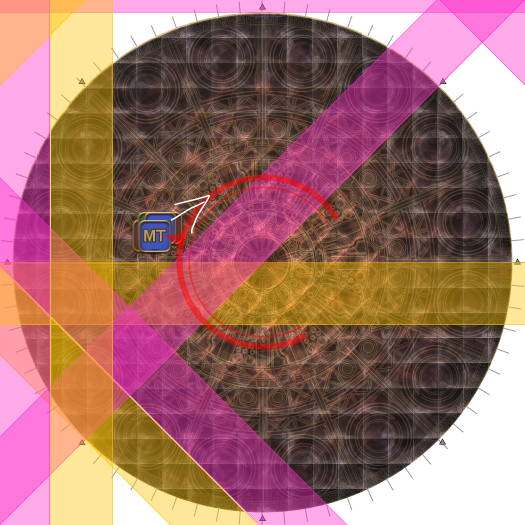
[Fulgent Blade] Why should the MT stay close to the inner corner of the diamond while dodging?
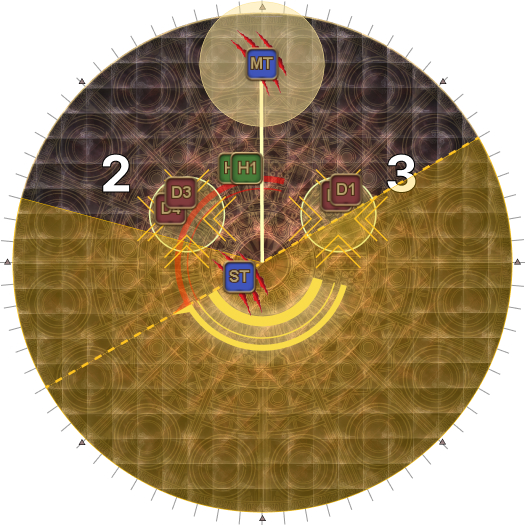
| This is done to orient the boss so that it is easy for the party to split for Akh Morn. The more the MT dodges to the side of the diamond where the exalines originated from (the area marked red), the more the boss is turned when it starts to cast Akh Morn and its orientation locked. The more the boss is turned, the harder it becomes for the party to properly split to the boss's left and right sides for Akh Morn- even impossible in extreme cases. | 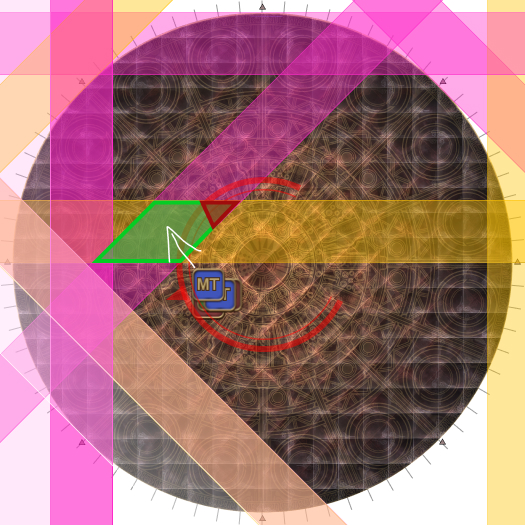 |
[Limit Break] Does Ryne and Gaia's "Yaaaaaargh!" exclamation guarantee that Pandora will be defeated?
| Unfortunately, no! Keep hitting the boss! |
Troubleshooting
[Fulgent Blade] Why is the boss slanted? One group can't make it to the other side of the boss for Akh Morn!
| Check how the MT is dodging the exalines. The more the MT dodges towards the side of the diamond where the exalines originated from (the area marked red), the more the boss is turned when it starts to cast Akh Morn and its orientation locked. | |
| The more the boss is turned, the harder it is for the light party to make it to the other side of the boss in time. Take note of the boss's orientation in this diagram (indicated by the white dashed line), which is when the party is supposed to split into left and right groups. Note: this is particularly pronounced when the MT dodges the Exalines diagonally (see Step 7 above), because it encourages them to dodge to that side of the diamond. This is why the MT should try to stay close to the inner corner while dodging the first two Exalines. |  |