AAC Light-heavyweight M3 (Savage)
Game8.jp has gone along with Nukemaru’s strat.
(English subtitled)
English
■ Spread ーーーーーー■ Quadruple Lariatーーー
 D3 MT D4        MT/D3     H2/D4
 H1 ★ H2                ★
 D1 ST D2         H1/D1     ST/D2
■ Octoboom Diveーー■ Quadroboom Diveーー
   MT ★ ST        ★
    D1 D2     MT/D1   D2/ST
 D3 H1 H2 D4   D3/H1   H2/D4
■ Barbarous Barrage (Knockback Towers)ーーー
 1st towers: N/W:Melee  S/E:Ranged
 2nd towers: MT team ← (BOSS) → ST team
■ Final Fusedown ※ Single long-fuse as North
 1st (short) H1/D3┃H1/D3 MT/D1
  MT/D1      ┃        ST/D2
  H2/D4 ST/D2  ┃2nd (long)  H2/D4
■ Fusefield ーーーーーーーーーーーーーーーーーー
 CW from North:short → long
 MT→ST→H1→H2 D1→D2→D3→D4
■ Bombarian Special ーーーーーーーーーーーーー
 Octoboom Bomb. Special → Basic Spread
 Quadroboom Bomb. Special → X Pairs
■ Fuse or Foe ーーーーーーーーーーーーーーーーー
 D3 MT D4
 D1  ★  D2
 H1 ST  H2
Japanese
■基本散開ーーーーーー■4ウェイーーーーーー
 D3 MT D4        MT/D3     H2/D4
 H1 ★ H2                ★
 D1 ST D2         H1/D1     ST/D2
■8ショックーーーーー■4ショックーーーーーー
  MT ★ ST               ★
   D1 D2           MT/D1   D2/ST
D3 H1 H2 D4      D3/H1   H2/D4
■ボンバリアンボム(ノックバック塔)ーーーーー
 1塔目 北西:近接、南東:遠隔
 2塔目 ボスを見て左側:MT組、右側:ST組
■零式フューズボムー※単体の長ボムを北に見る
1回目短   北H1/D3 ┃H1/D3 MT/D1
 MT/D1          ┃           ST/D2
 H2/D4 ST/D2     ┃ 2回目長     H2/D4
■フューズフィールドーーーーーーーーーーー
 Aから時計回りで探す 短→長
 MT→ST→H1→H2 D1→D2→D3→D4
■ボンバリアンスペシャルーーーーーーーーー
8ショック/基本散開
4ショック/ペアX受け
■極盛り式スピニングファイヤー(アタッチ)ーー
 D3 MT D4
 D1  ★  D2
 H1 ST  H2
Markers
- All markers are primarily for Fuse or Foe.
These markers use the colours to indicate pairs.
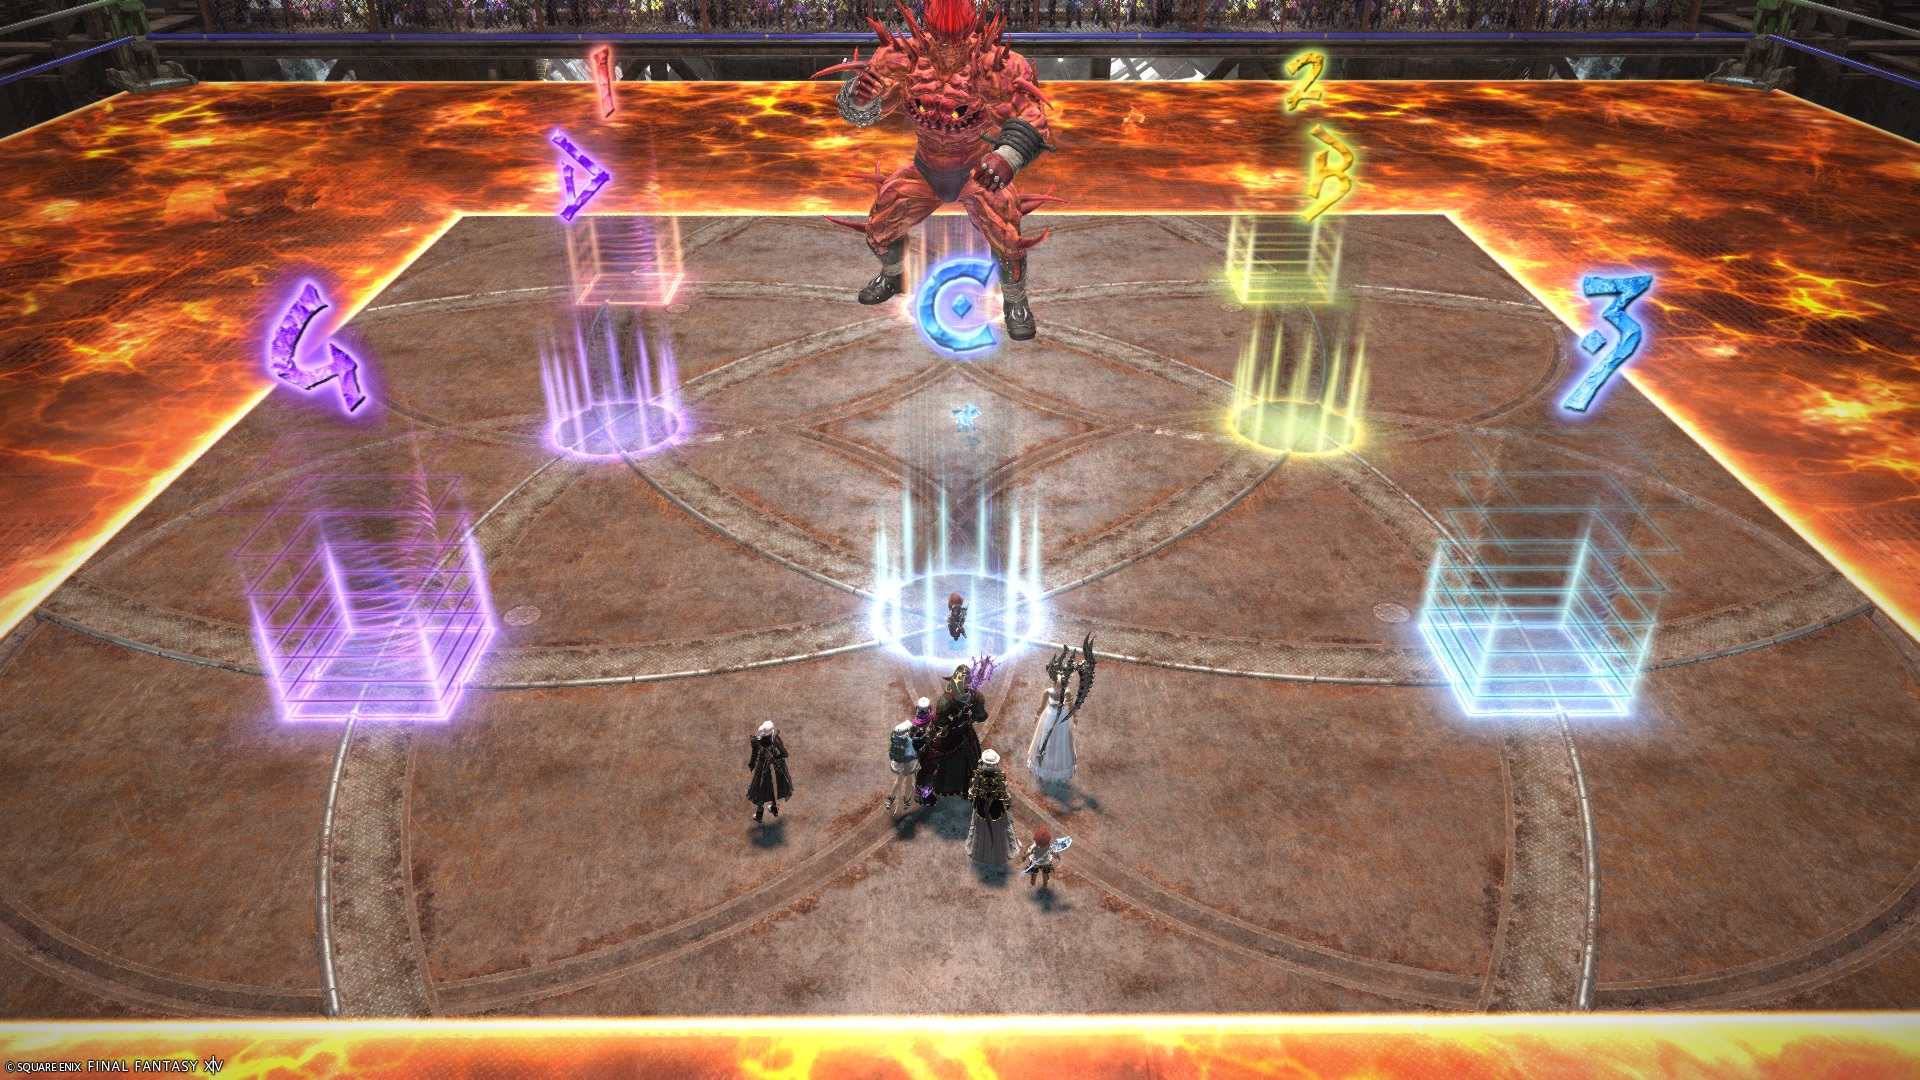
XIVLauncher WaymarkPresetPlugin positions
{
  "Name":"M3S (EN)",
  "MapID":990,
  "A":{"X":100.0,"Y":0.0,"Z":93.0,"ID":0,"Active":true},
  "B":{"X":107.0,"Y":0.0,"Z":100.0,"ID":1,"Active":true},
  "C":{"X":100.0,"Y":0.0,"Z":107.0,"ID":2,"Active":true},
  "D":{"X":93.0,"Y":0.0,"Z":100.0,"ID":3,"Active":true},
  "One":{"X":91.5,"Y":0.0,"Z":91.5,"ID":7,"Active":true},
  "Two":{"X":108.5,"Y":0.0,"Z":91.5,"ID":4,"Active":true},
  "Three":{"X":108.5,"Y":0.0,"Z":108.5,"ID":5,"Active":true},
  "Four":{"X":91.5,"Y":0.0,"Z":108.5,"ID":6,"Active":true}
}
These markers are more likely to be used by Japanese parties.
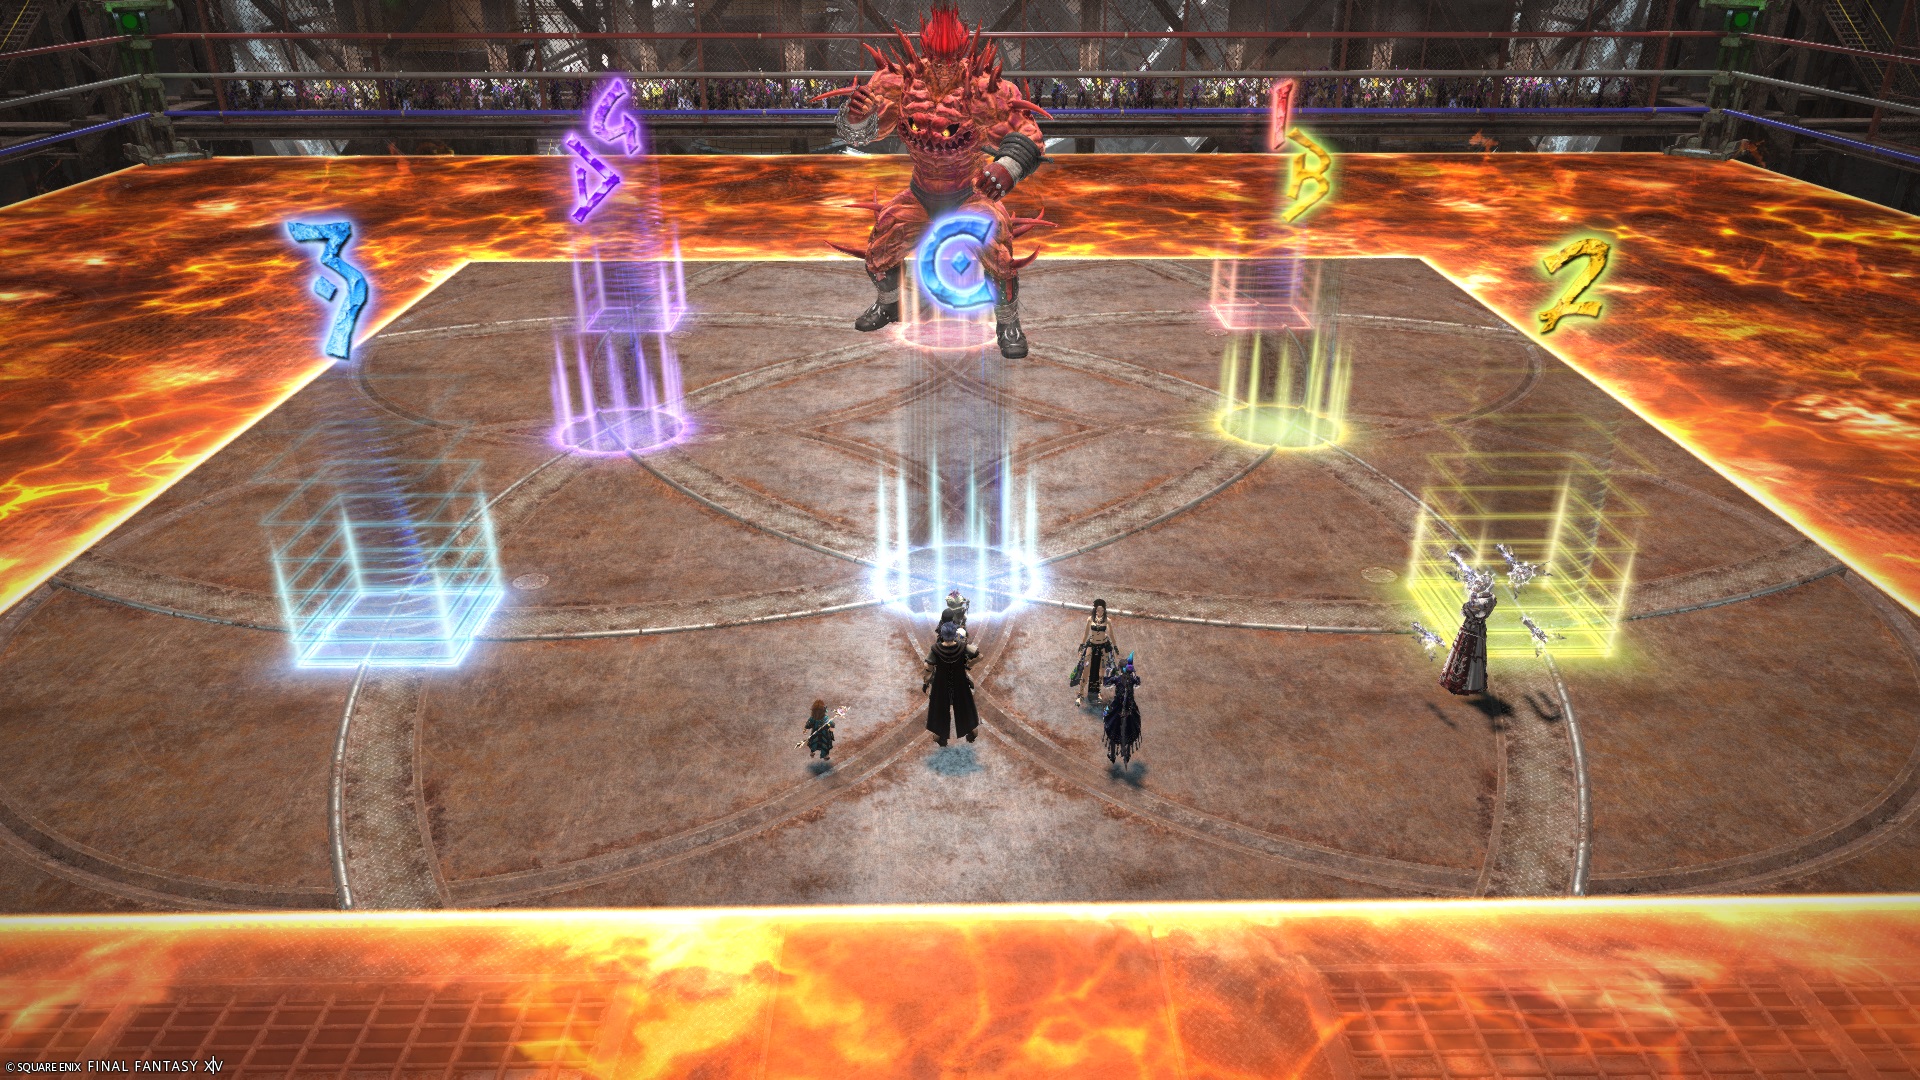
XIVLauncher WaymarkPresetPlugin positions
{
  "Name":"M3S (JP)",
  "MapID":990,
  "A":{"X":100.0,"Y":0.0,"Z":93.0,"ID":0,"Active":true},
  "B":{"X":107.0,"Y":0.0,"Z":100.0,"ID":1,"Active":true},
  "C":{"X":100.0,"Y":0.0,"Z":107.0,"ID":2,"Active":true},
  "D":{"X":93.0,"Y":0.0,"Z":100.0,"ID":3,"Active":true},
  "One":{"X":108.5,"Y":0.0,"Z":91.5,"ID":5,"Active":true},
  "Two":{"X":108.5,"Y":0.0,"Z":108.5,"ID":6,"Active":true},
  "Three":{"X":91.5,"Y":0.0,"Z":108.5,"ID":7,"Active":true},
  "Four":{"X":91.5,"Y":0.0,"Z":91.5,"ID":4,"Active":true}
}
Timeline

Frequently Asked Questions
[Damage Down] How strong is the damage down debuff in this fight?
| The Damage Down debuff in this encounter lowers a player's damage by 38% for 30 seconds. |
Troubleshooting
[Barbarous Barrage] I keep getting the angle slightly off, and get knocked out the arena with the last tower!
| It's tempting to stand near the center of the tower to maximise your distance to the edge, but doing so makes your knockback angle much more sensitive to your positioning (increasing the chance you get knocked enough sideways out of the arena). Stand towards the outer end of the tower instead. This makes your knockback direction less sensitive to your positioning, and the knockback distance isn't enough to throw you out of the arena. |