AAC Light-heavyweight M2 (Savage)
Game8.jp has gone along with Nukemaru’s strat.
(English subtitled)
English
■ Basic Spreads
 D3 MT D4   D3 D4   MT/D3 ST/D4
 H1 ☆ H2     MT ST     H1/D1 D2/H2
 D1 ST D2     D1 D2
            H1 H2
■ Honey B. Live: 1st Beat
 Melee:Get 2♡ Ranged:Get 3♡ 2♡:Stack
■ Honey B. Live: 2nd Beat
 0♡:Mid → N → Stacks: TH West, DPS East
 1♡:S → No-AoE take tower: TH N/W, DPS S/E
■ Alarm Pheromones 2  TH:NW, DPS:SE
■ Honey B. Live: 3rd Beat
 AoEs → intercard Towers → use pair positions
■ Rotten Heart (Clock positions)
 Raid-wide → Heal → Shortest debuff pair mid
Japanese
■基本散開
D3 MT D4   D3 D4    MT/D3  ST/D4
H1 ☆ H2     MT ST     H1/D1   D2/H2
D1 ST D2     D1 D2
           H1 H2
■1stライヴ
近接:♡2(頭割り処理) 遠隔:♡3
■2ndライヴ
♡0:中心→北→TH西、DPS東で頭割り
♡1:南待機→AOE対象者は捨てる 塔:TH 北/西 DPS南/東
■毒捨て TH:北西、DPS:南東
■3ndライヴ
デバフ捨て、塔踏みはペア割基準
■ブラックハート
8方向散開 HPが戻り次第、早いペア順に中央集合
Markers
There are a couple different markers you can use.
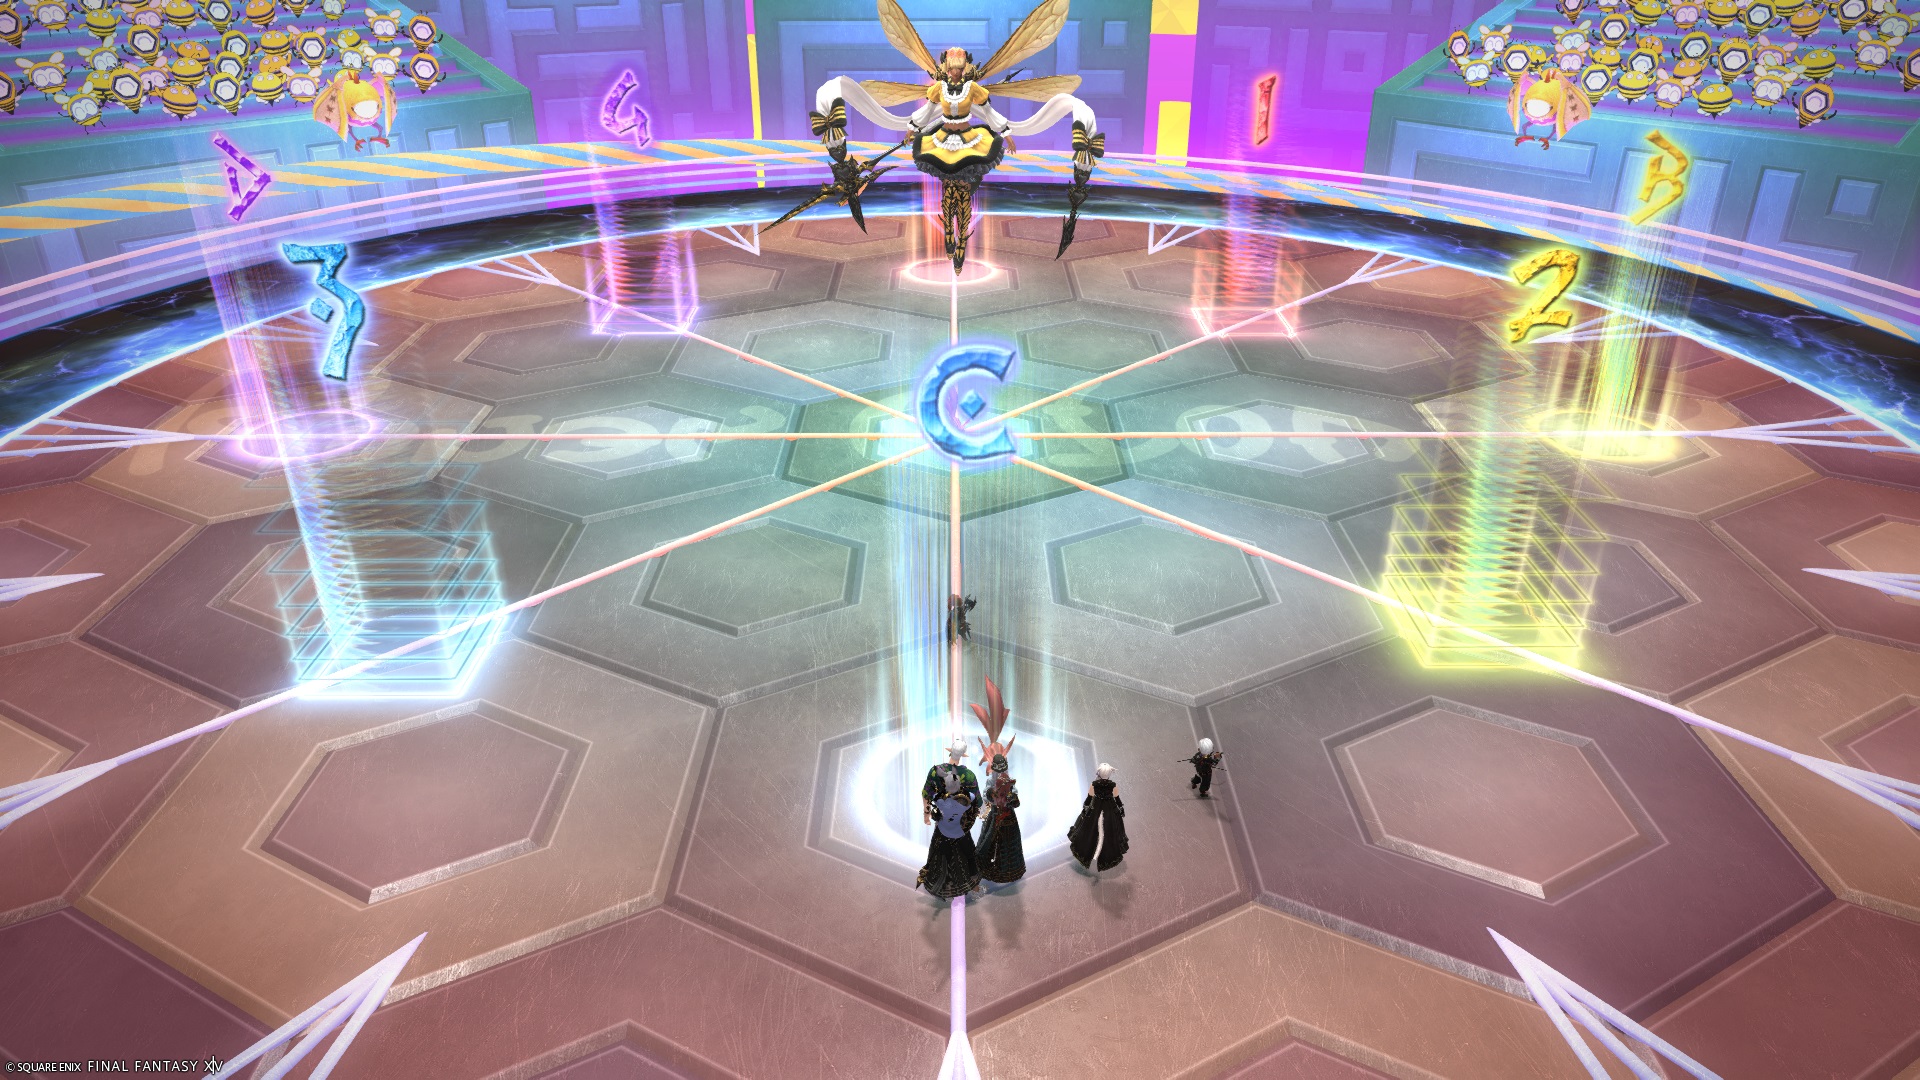
Nukemaru’s markers
These are the markers used on Nukemaru’s video. You may sometimes see the 1234 markers rotated such that 1 is on the North-West.
- The
ABCDmarkers are just for orientation. - The
1234markers mark the boundary for the boss’s line AoEs (markers are safe).
XIVLauncher WaymarkPresetPlugin positions
{
  "Name":"M2S (Nukemaru)",
  "MapID":988,
  "A":{"X":100.0,"Y":0.0,"Z":86.0,"ID":0,"Active":true},
  "B":{"X":114.0,"Y":0.0,"Z":100.0,"ID":1,"Active":true},
  "C":{"X":100.0,"Y":0.0,"Z":114.0,"ID":2,"Active":true},
  "D":{"X":86.0,"Y":0.0,"Z":100.0,"ID":3,"Active":true},
  "One":{"X":108.625,"Y":0.0,"Z":91.375,"ID":5,"Active":true},
  "Two":{"X":108.625,"Y":0.0,"Z":108.625,"ID":6,"Active":true},
  "Three":{"X":91.375,"Y":0.0,"Z":108.625,"ID":7,"Active":true},
  "Four":{"X":91.375,"Y":0.0,"Z":91.375,"ID":4,"Active":true}
}
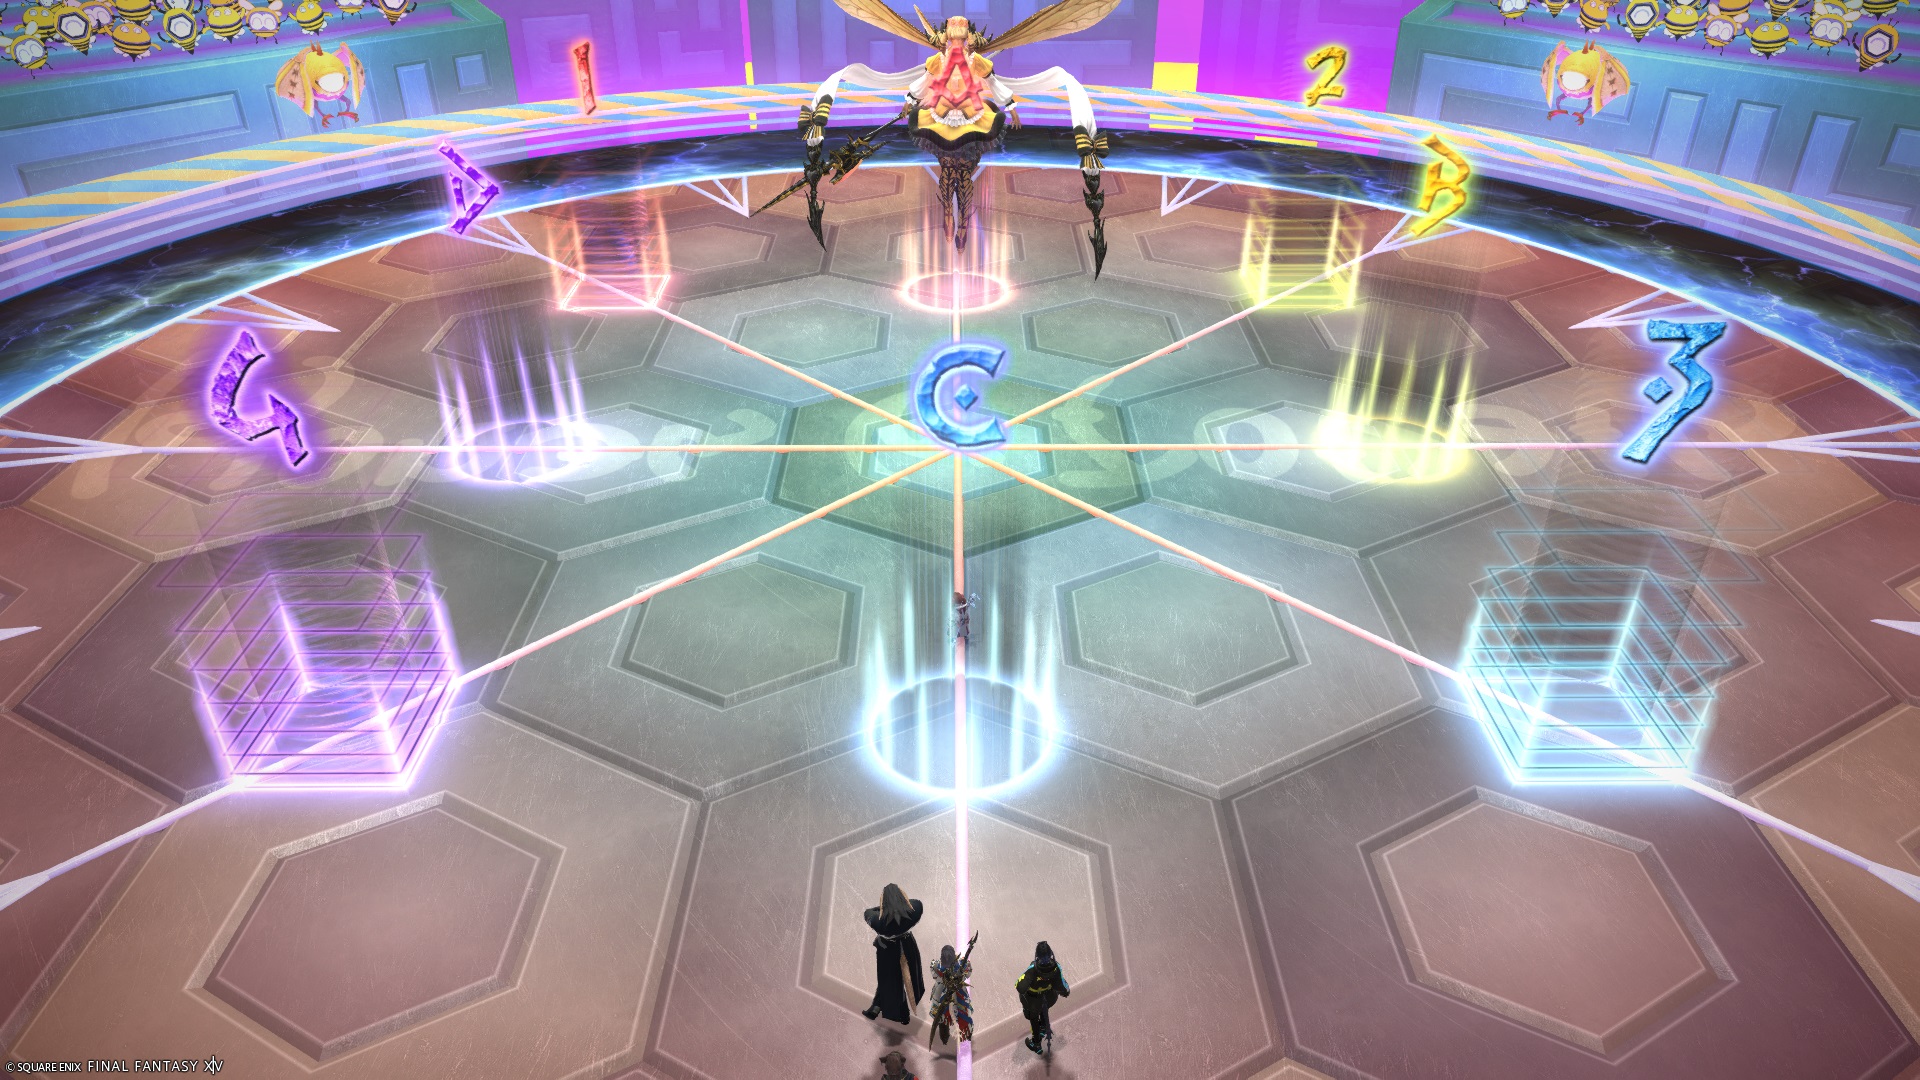
Box markers
I personally prefer these markers. In addition to the points in the markers above:
- The
ABCDmarkers are in melee range of the boss while still dodging Honey Beeline and the point-blank AoE in Centerstage/Outerstage Combo.
XIVLauncher WaymarkPresetPlugin positions
{
  "Name":"M2S (Box)",
  "MapID":988,
  "A":{"X":100.0,"Y":0.0,"Z":91.375,"ID":0,"Active":true},
  "B":{"X":108.625,"Y":0.0,"Z":100.0,"ID":1,"Active":true},
  "C":{"X":100.0,"Y":0.0,"Z":108.625,"ID":2,"Active":true},
  "D":{"X":91.375,"Y":0.0,"Z":100.0,"ID":3,"Active":true},
  "One":{"X":91.375,"Y":0.0,"Z":91.375,"ID":7,"Active":true},
  "Two":{"X":108.625,"Y":0.0,"Z":91.375,"ID":4,"Active":true},
  "Three":{"X":108.625,"Y":0.0,"Z":108.625,"ID":5,"Active":true},
  "Four":{"X":91.375,"Y":0.0,"Z":108.625,"ID":6,"Active":true}
}
Timeline

Frequently Asked Questions
[Damage Down] How strong is the damage down debuff in this fight?
| The Damage Down debuff in this encounter lowers a player's damage by 26% for 30 seconds. |
[Honey B. Live: 1st Beat] Is a ranged player supposed to end up with two hearts?
| Yes- assuming nobody takes an extra heart, there should be five players with two hearts, not four. The party actually has a one-heart margin of error. If you look closely, that's also why there's a subtle difference between the English and Japanese macros:
This is important, because the stack targets a random player with the fewest hearts (which could be a ranged), but it's also good practice to associate "stacking together" with "having two hearts", instead of "being melee". That means if anyone accidentally messes up and takes one extra heart, everything still works out because the remaining four players with two hearts can share the stack. |
[Heartsick (stacks)] How are hearts distributed?
| All stacks distribute a total of 4 hearts to players in the stack. Who gets the hearts seem to be decided by:
As a result:
|
[Rotten Heart] What's the latest you can trigger the debuffs before the raid-wide?
| The latest you can trigger the α and β debuffs and have the Magic Vulnerability Up wear off before Call Me Honey is when there is 3 seconds left on the debuff. |