Appendix A: Differences with Elemental
If you are already familiar with the Elemental DSR PF strat, this is just a summary of the differences between Elemental and Mana.
P1. The Holy See
| Elemental | Mana | |
|---|---|---|
| Which tank takes which boss |
|
|
| Hyperdimensional Slash | Markers south first | Markers north first |
| Playstation markers | 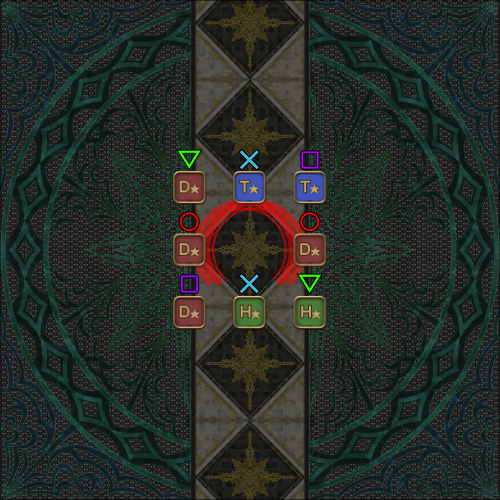 DPS ▽ NW, Healer ▽ SE | 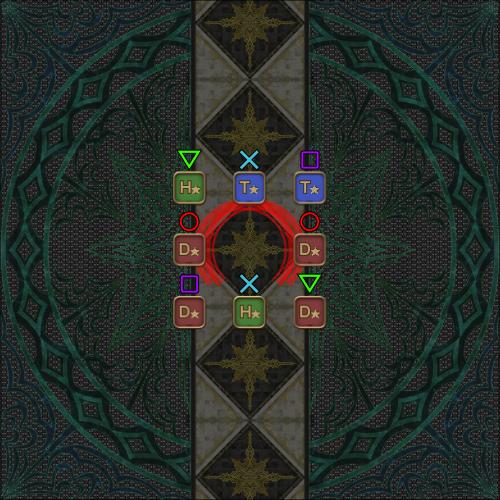 Healer ▽ NW, DPS ▽ SE |
P2. Thordan
| Elemental | Mana | |
|---|---|---|
| Ascalon's Might cleaves #1 | Holmgang > mitigate | MT always invulns |
| Strength of the Ward | Tanks criss-cross tethers | Tanks do not criss-cross tethers |
| Heavenly Heel → Ascalon's Might cleaves | Tank swap | ST always invulns |
P3. Nidhogg
| Elemental | Mana | |
|---|---|---|
| Initial positions | 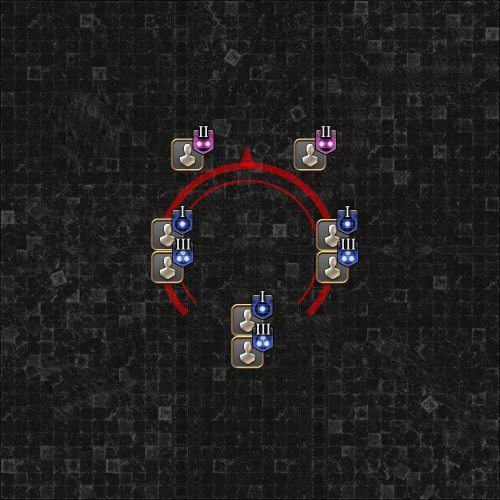 | 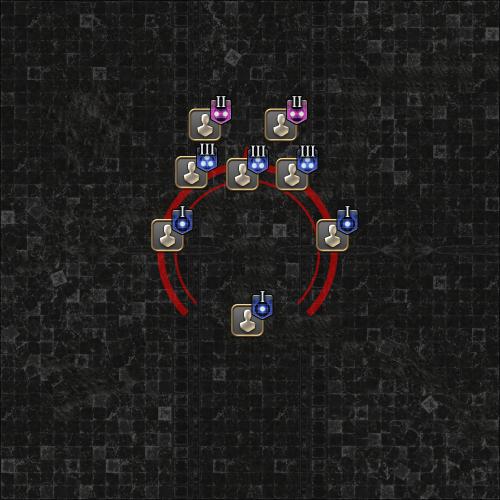 |
| 3s position West, South, and East of the boss. | 3s line up North, from West-to-East. | |
| Wyrmhole | Easthogg (↑ West, ↓ East, face East) | Westhogg (↓ West, ↑ East, face West) |
| Soul tethers | Both tanks invuln + stack in the middle | Both tanks mitigate, only MT goes middle |
P4. Eyes
| Elemental | Mana | |
|---|---|---|
| Starting tethers | 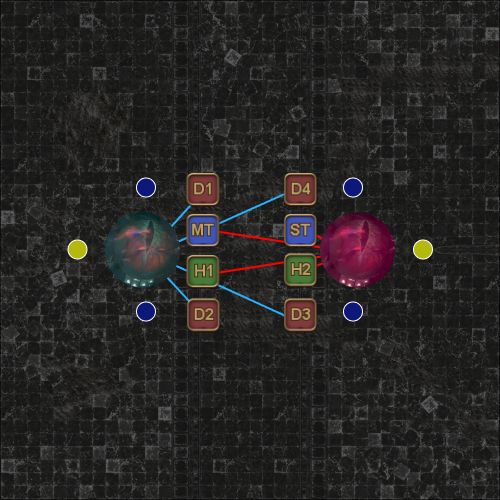
| 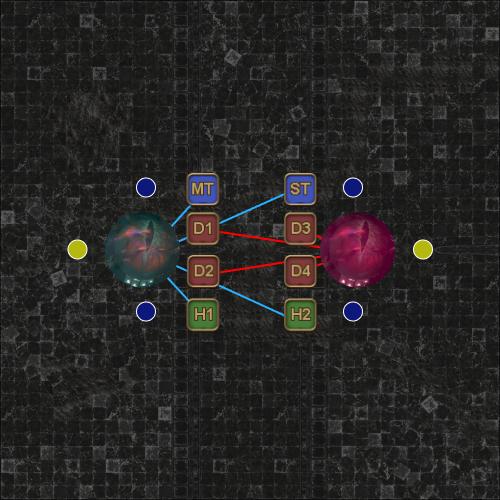
|
| After popping yellow orbs | Red tethers wait, blue tethers move to swap | Blue tethers wait, red tethers move to swap |
| Mirage Dives | CCW/CW from North 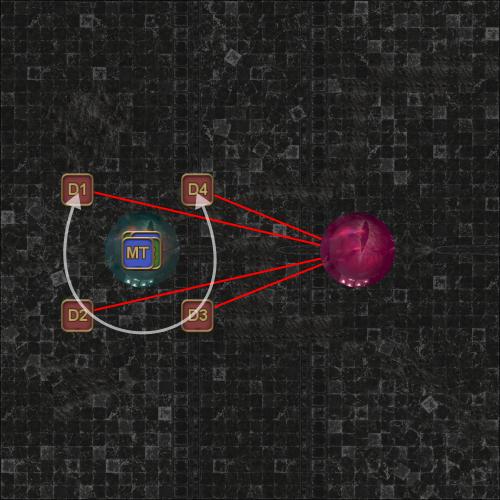
| CW/CCW from West 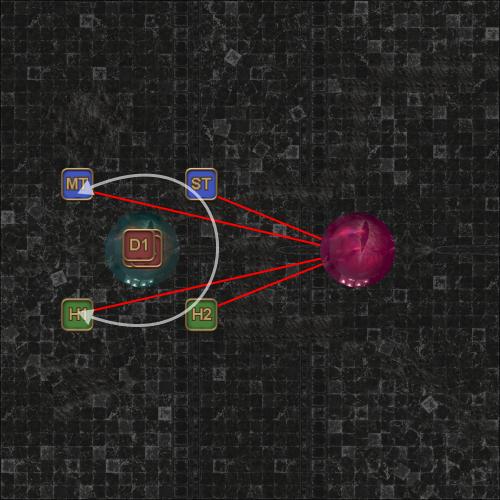
|
P5. Alternate Timeline Thordan
| Elemental | Mana | |
|---|---|---|
| Death of the Heavens |
|
|
| Caster LB2 | Wherever convenient | Always North |
P6. Double Dragons
| Elemental | Mana | |
|---|---|---|
| Wyrmsbreath #1 |
H1 H2 D4 anchor, D1 D2 D3 adjusts |
D1 H1 D4 anchor, D2 D3 H2 adjusts |
| Wroth Flames | Purple debuffs West Automarkers used | White + no debuffs West West: MT ST D1 D2 D3 D4 H1 H2 :East |
| Wyrmsbreath #2 | 5-1 (D3 south) | Fixed WB2  |
P7. Dragonking Thordan
| Elemental | Mana | |
|---|---|---|
| Trinity |
|
|
| Akh Morn #2 | Mitigated | Tank LB3 |