Dragonsong’s Reprise (Ultimate)
Mana PF follows Lily Doll’s DSR strat:
- The Holy See: HMRT
- King Thordan: DRK-relative, role adjust
- Nidhogg: Westhogg
- Eyes: T/H blue, DPS red
- Alternate Timeline Thordan: 2-2 Dooms South, Anchored Dooms
- Double Dragons: △ WB1, DTTMR Mortal Vow, fixed WB2
- Dragonking Thordan: All 3-3-2
BiS Notes
- Any gear at or above i730 will have their substats capped.
- Relic weapons will have their substats capped at 269.
- Use the highest available food and potions.
The Holy See
Dragonsong’s Reprise is the first Ultimate to showcase a “door” boss. As such, there are two sets of markers and macros to use for this fight.
All markers are used to bait Hyperdimensional Slashes (black orbs).
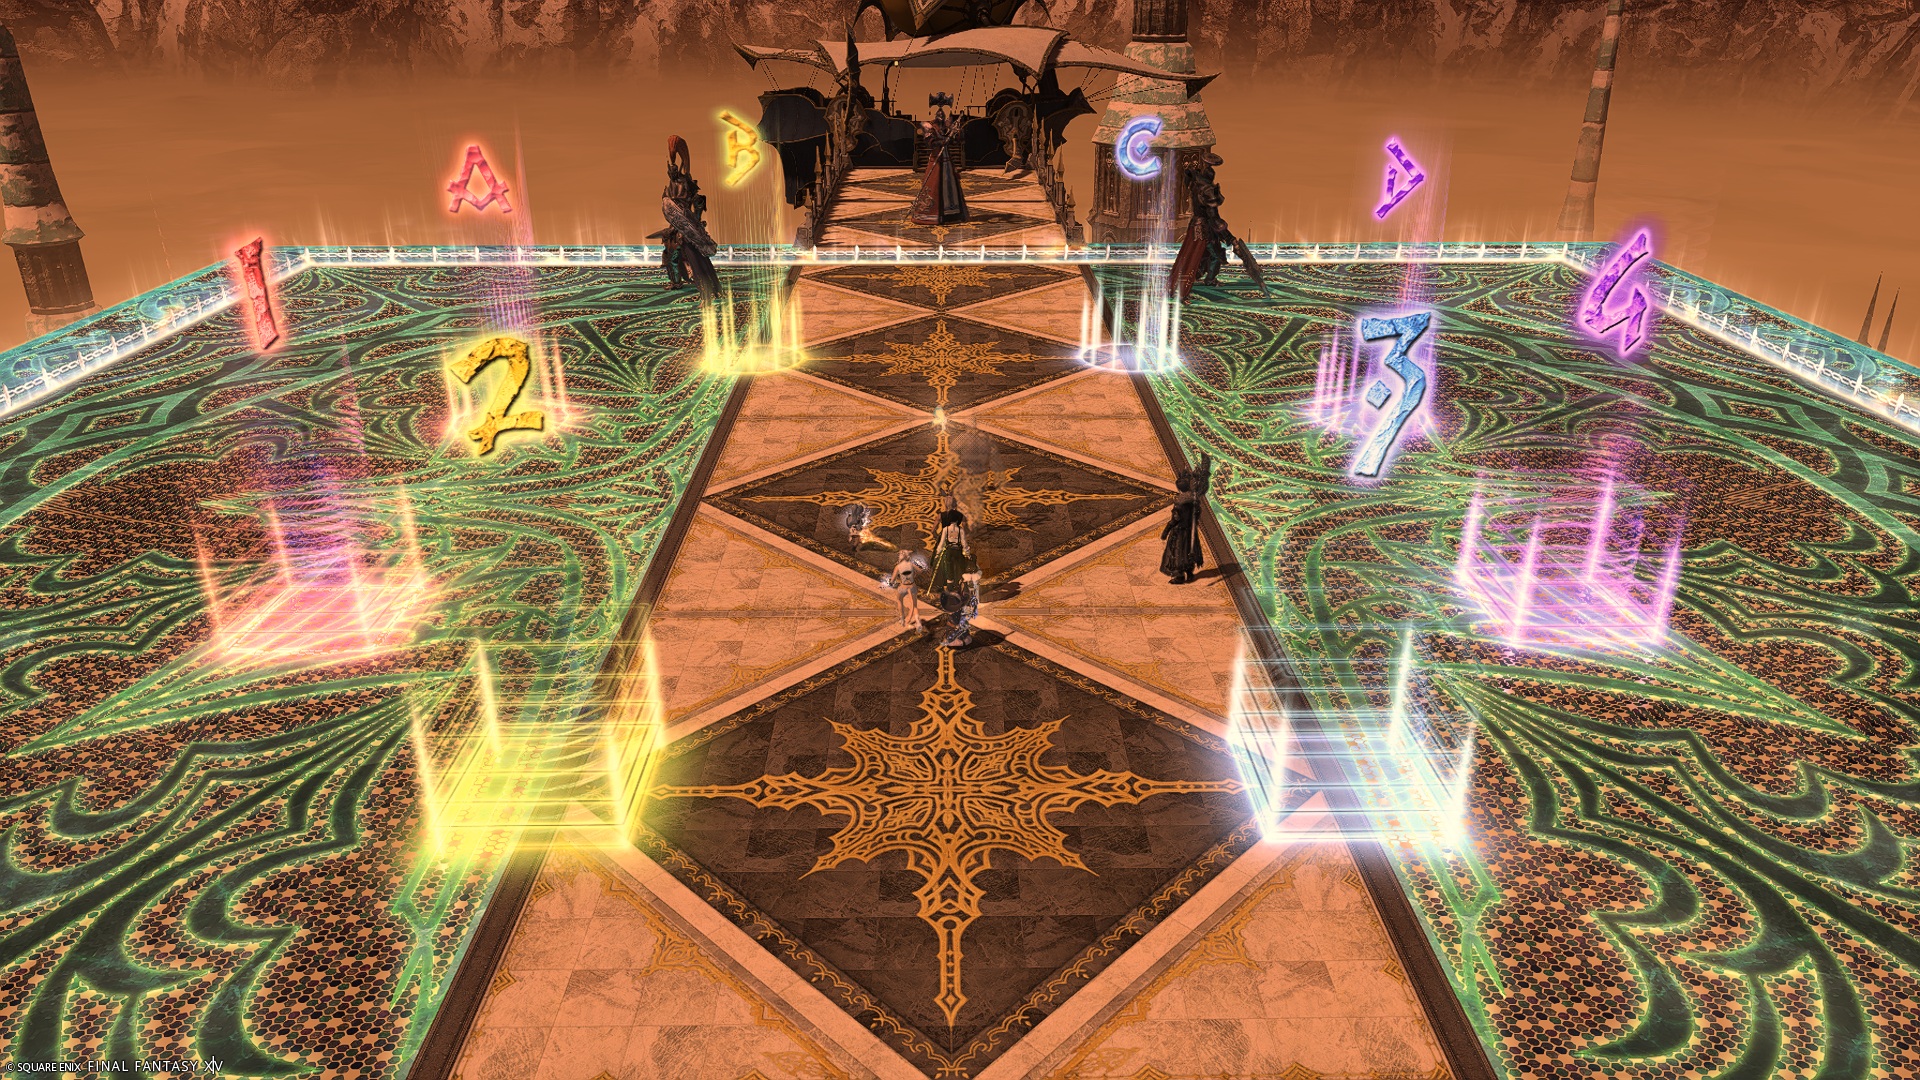
XIVLauncher WaymarkPresetPlugin positions
{
  "Name":"DSR P1 (Mana)",
  "MapID":788,
  "A":{"X":90.0,"Y":0.0,"Z":95.0,"ID":0,"Active":true},
  "B":{"X":95.0,"Y":0.0,"Z":90.0,"ID":1,"Active":true},
  "C":{"X":105.0,"Y":0.0,"Z":90.0,"ID":2,"Active":true},
  "D":{"X":110.0,"Y":0.0,"Z":95.0,"ID":3,"Active":true},
  "One":{"X":90.0,"Y":0.0,"Z":105.0,"ID":4,"Active":true},
  "Two":{"X":95.0,"Y":0.0,"Z":110.0,"ID":5,"Active":true},
  "Three":{"X":105.0,"Y":0.0,"Z":110.0,"ID":6,"Active":true},
  "Four":{"X":110.0,"Y":0.0,"Z":105.0,"ID":7,"Active":true}
}
King Thordan
Mana PF uses the “outer” markers.
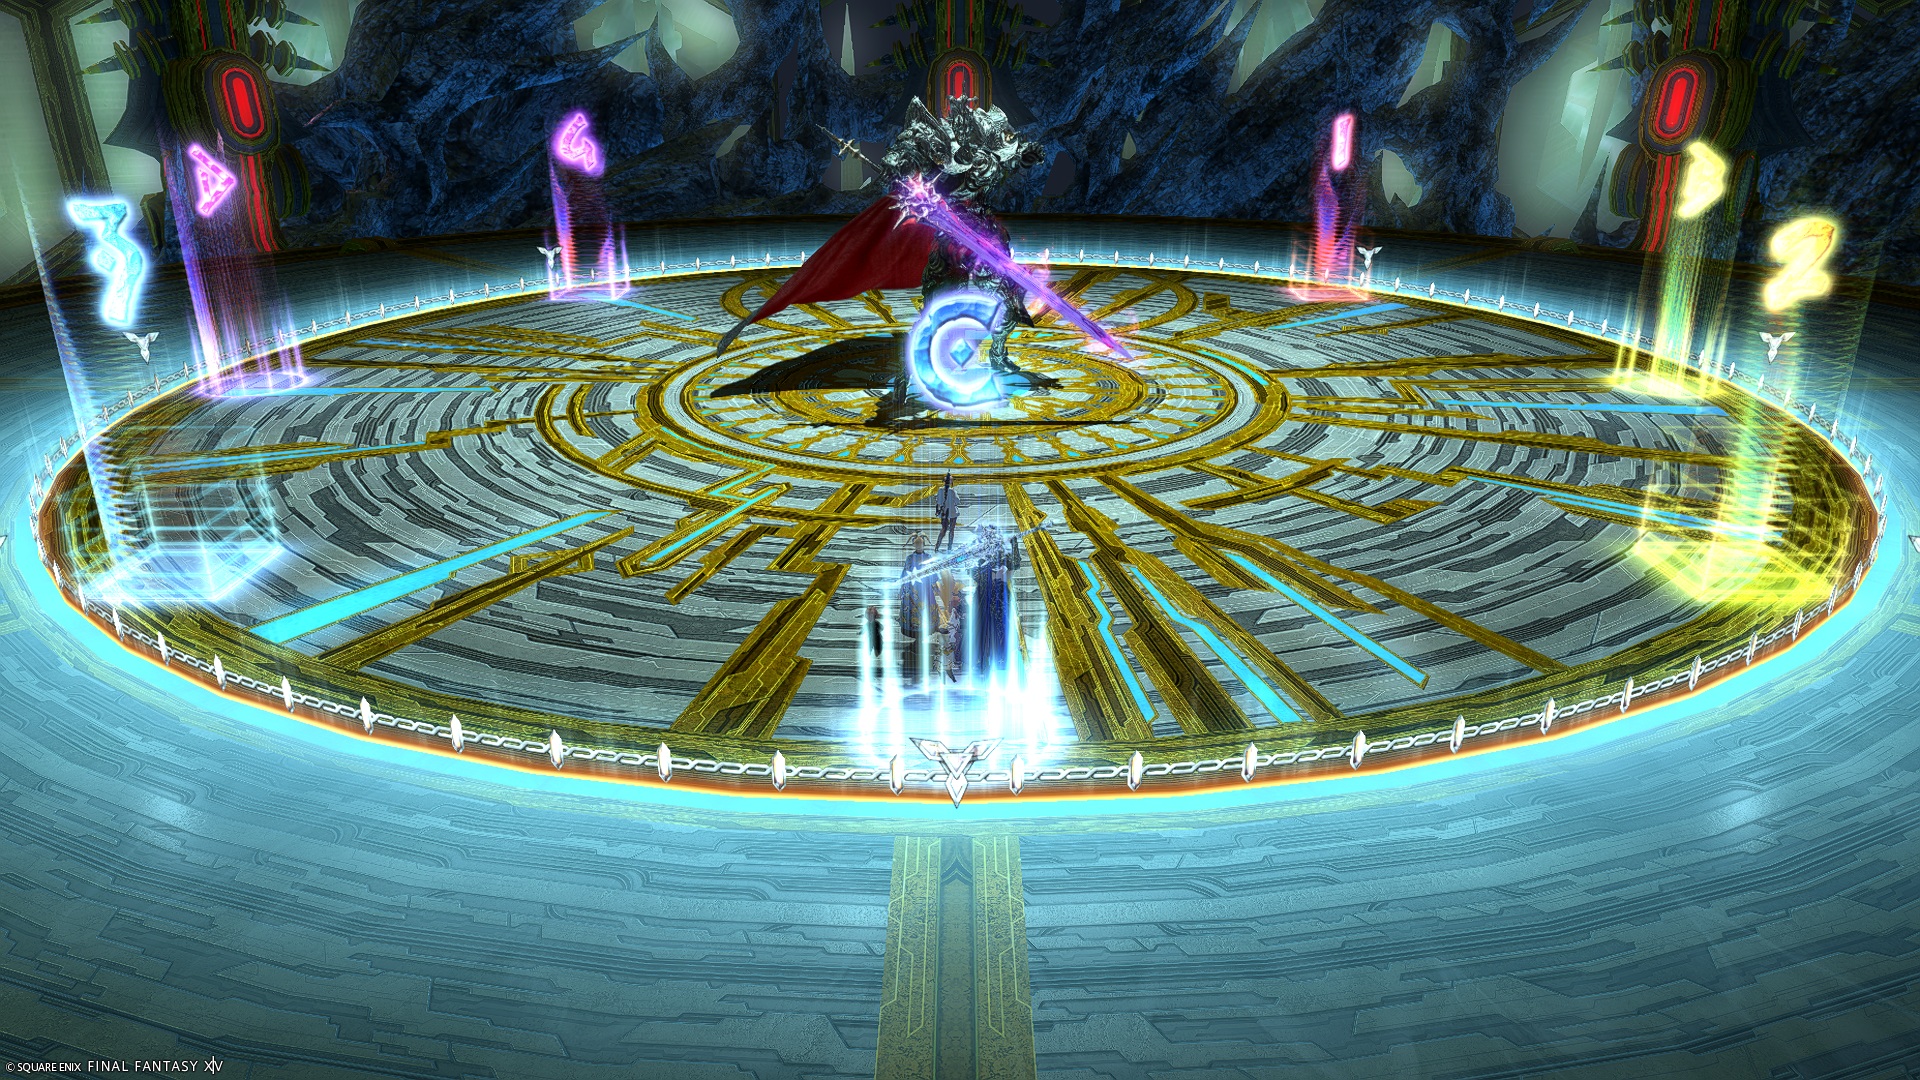
XIVLauncher WaymarkPresetPlugin positions
{
  "Name":"DSR P2 (Mana)",
  "MapID":788,
  "A":{"X":100.0,"Y":0.0,"Z":80.0,"ID":0,"Active":true},
  "B":{"X":120.0,"Y":0.0,"Z":100.0,"ID":1,"Active":true},
  "C":{"X":100.0,"Y":0.0,"Z":120.0,"ID":2,"Active":true},
  "D":{"X":80.0,"Y":0.0,"Z":100.0,"ID":3,"Active":true},
  "One":{"X":114.0,"Y":0.0,"Z":86.0,"ID":4,"Active":true},
  "Two":{"X":114.0,"Y":0.0,"Z":114.0,"ID":5,"Active":true},
  "Three":{"X":86.0,"Y":0.0,"Z":114.0,"ID":6,"Active":true},
  "Four":{"X":86.0,"Y":0.0,"Z":86.0,"ID":7,"Active":true}
}
Frequently Asked Questions
[Damage Down] How strong is the damage down debuff in this fight?
The Damage Down debuff in this phase lowers a player's damage by 50%. |